Access DFU and Bootloader Mode
Not all radios go into Bootloader or DFU mode the same way. Below you will find descriptions how to get into Bootlader and DFU mode for many EdgeTX radios.
BETAFPV LiteRadio 3 Pro
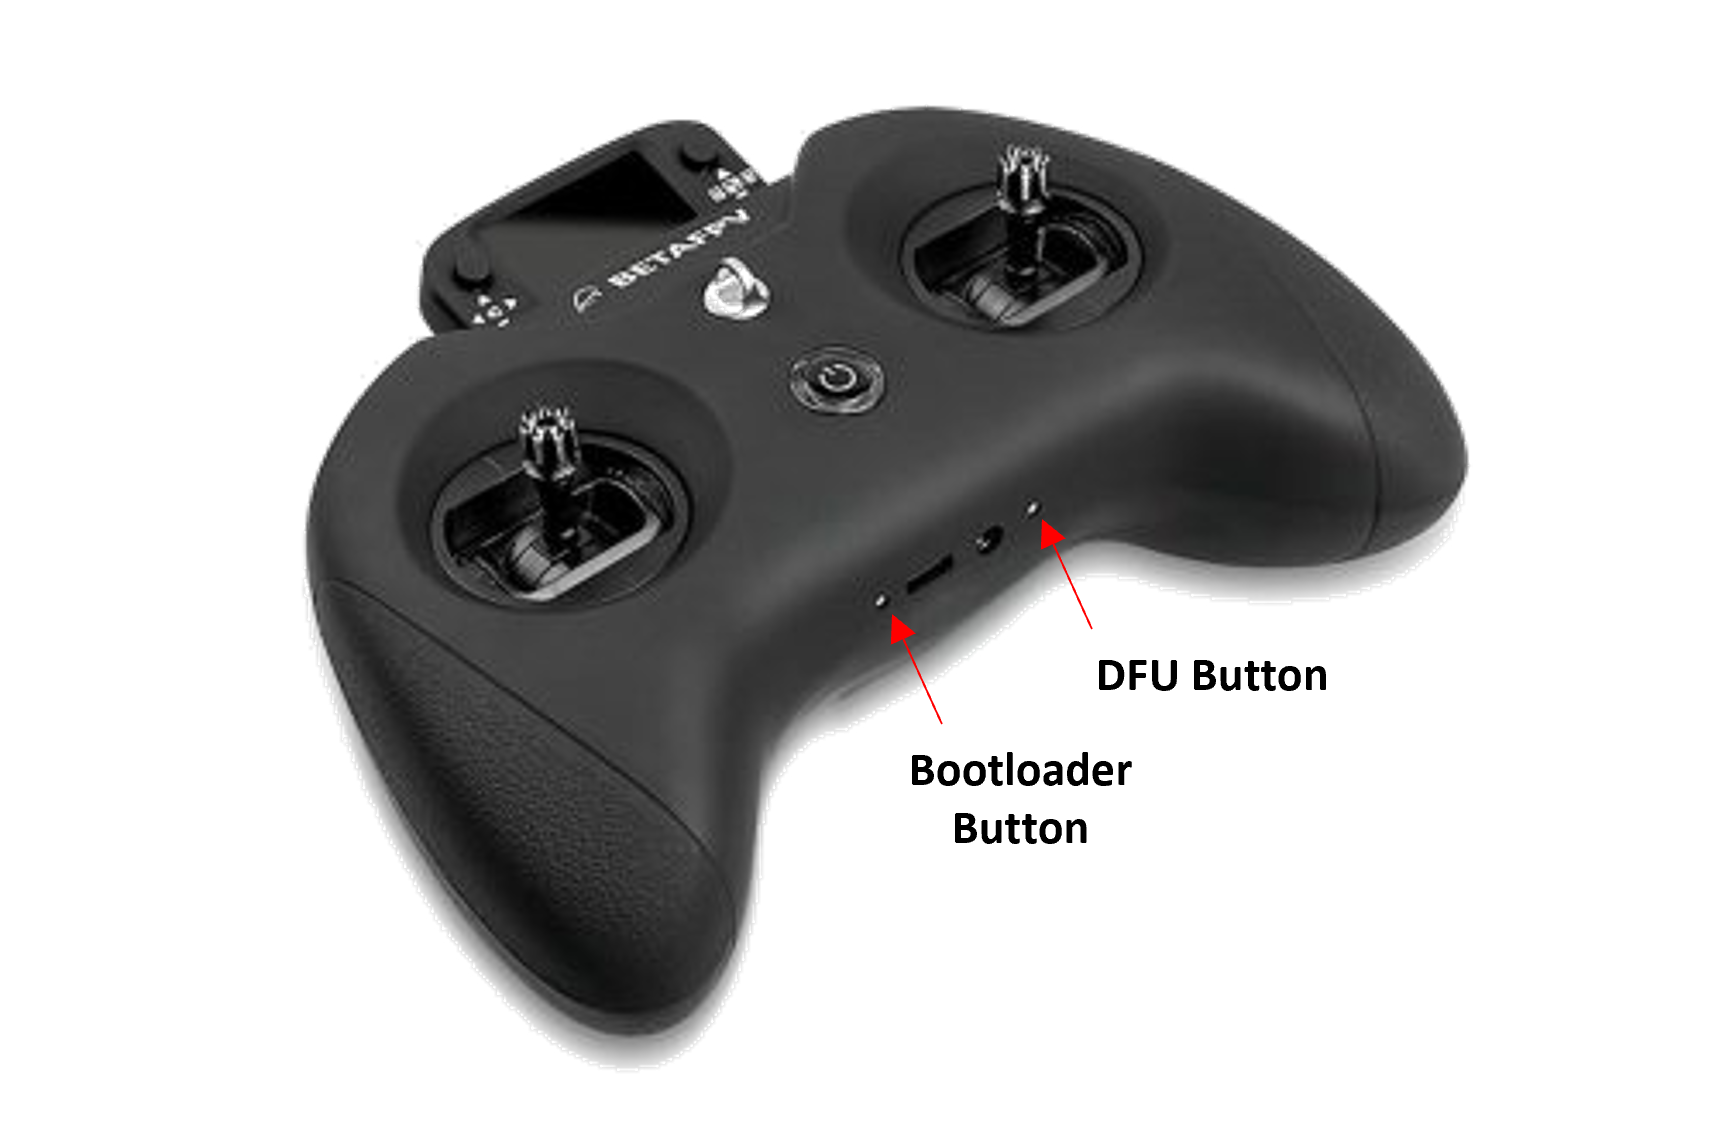
Bootloader: Turn off the radio transmitter. Press the Bootloader button and Power button, release at the same time.
DFU: Turn off the radio transmitter. Press and hold the DFU button and plug in the USB cable, release the DFU button.
Note: In early versions of the LiteRadio 3 Pro, the DFU button was non-functional, which prevented DFU mode from being enabled. However, in the current version of the radio, the DFU button has been fixed and is now working correctly.
Flysky NV14 / EL18
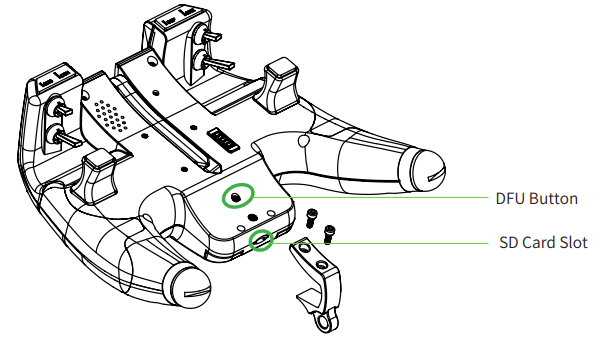
Bootloader: Turn off the radio transmitter. Pull both trims inward and press both power buttons.
DFU: Turn off the radio transmitter. Press and hold the DFU button and plug in the USB cable, release the DFU button.
Flysky Noble+ (NB4+)
Bootloader: TODO
DFU: TODO
Flysky PA01
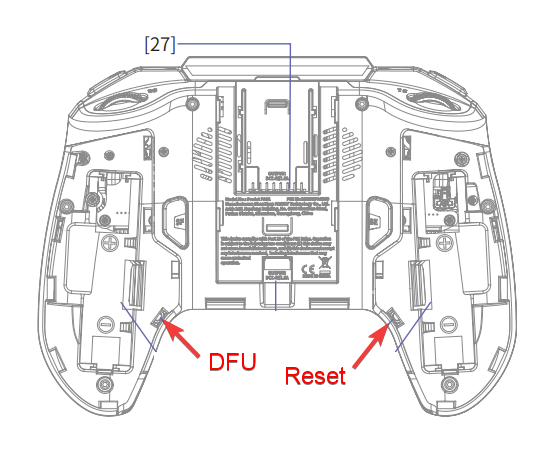
Bootloader: Turn off the radio transmitter. Pull both horizontal trims (T1 and T4) inwards, and press the power button.
DFU: Turn off the radio transmitter. Turn the radio over so you are looking at the back of it. Remove the left side battery cover. Use a non-conductive (i.e. plastic) object to press and hold the DFU button down, and plug in the USB cable. Release the DFU button. The cooling fan will be running at full speed if you have done this correctly.
Flysky PL18 / PL18 EV
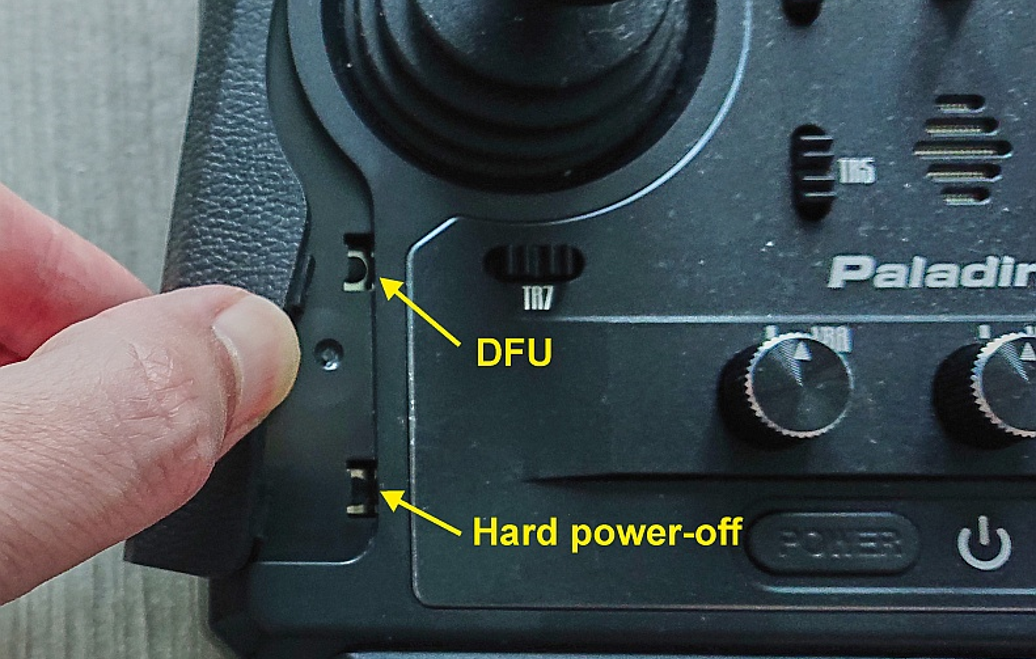
Bootloader: Turn off the radio transmitter. Pull both horizontal trims (TR7 and TR8) together and press both power buttons.
DFU: Turn off the radio transmitter. Press and hold the DFU button and plug in the USB cable, release the DFU button.
Flysky ST16
Bootloader: Turn off the radio transmitter. Pull both horizontal trims (TR3 and TR4) together and press the power button.
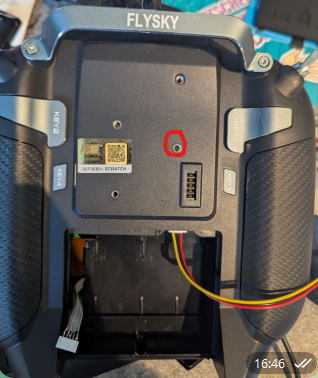
DFU: Turn off the radio transmitter. Press and hold the DFU button (circled in the image below) and plug in the USB cable, release the DFU button.
iFlight Commando8
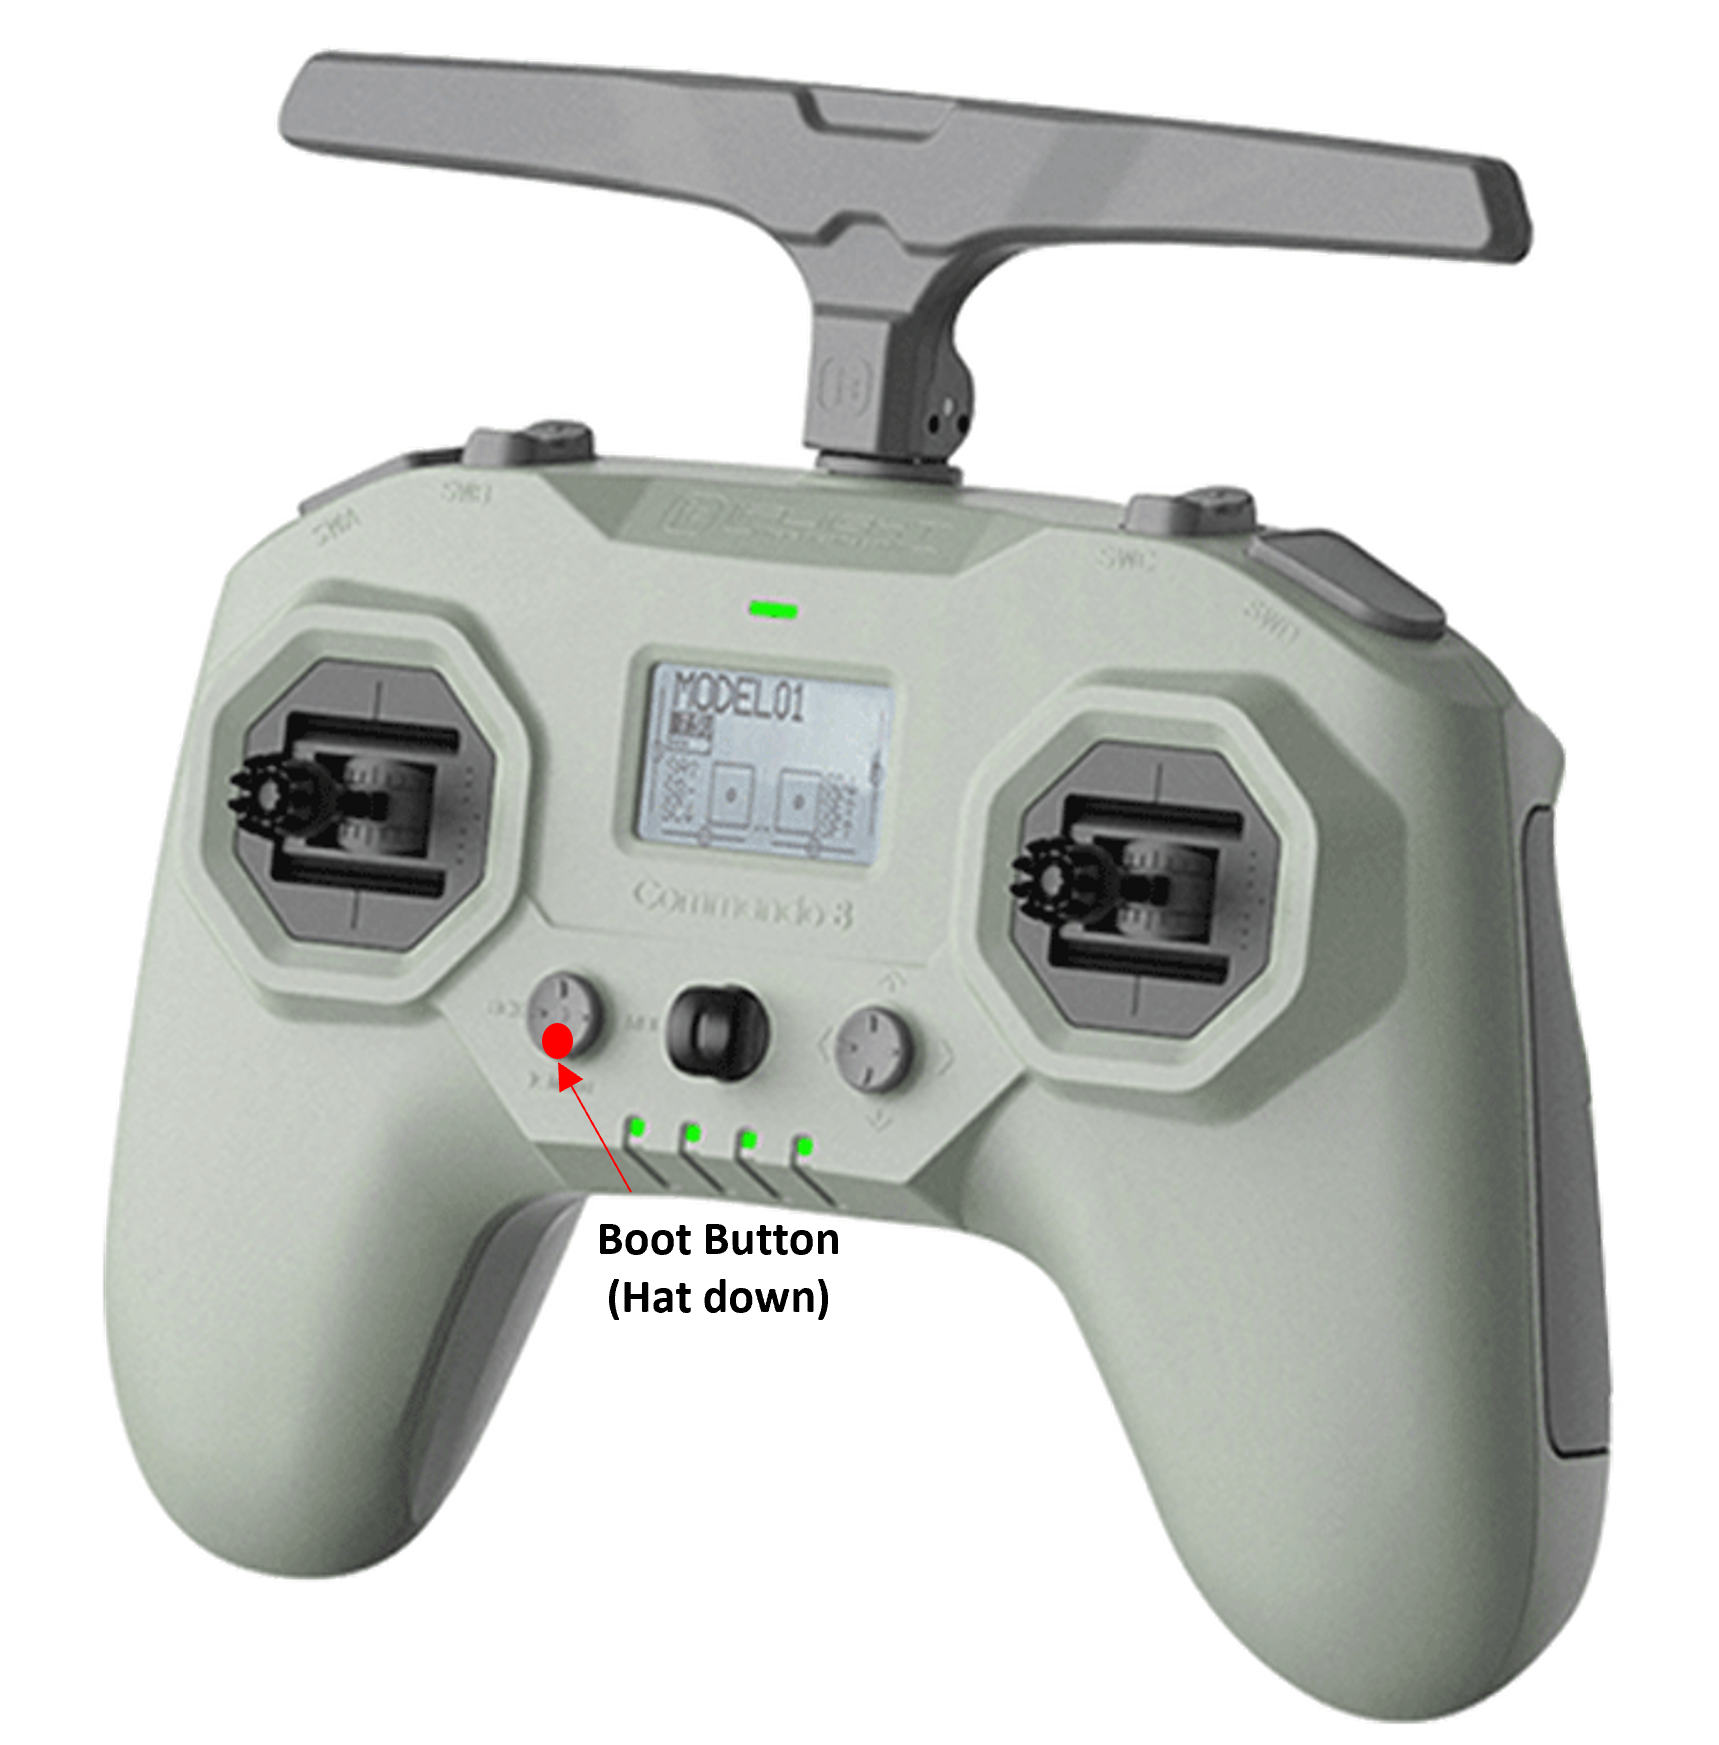
Bootloader: Turn off the radio transmitter. Press the Boot button and Power button, release at the same time.
DFU: Turn off the radio transmitter. Conect the USB cable from your computer to your radio. Hold down the Boot button, then push and hold the Power button. The screen will stay dark, the LEDs will run from left to right. Radio is now in DFU mode.
Jumper T12/T16/T18
Bootloader: Turn off the radio transmitter. Pull both horizontal trim switches together and press the power button.
DFU: Turn off the radio transmitter. Plug in the USB cable to the USB port on the top of the radio.
Jumper T12 MAX
Bootloader: Turn off the radio transmitter. Pull both horizontal trim switches together and press the power button.
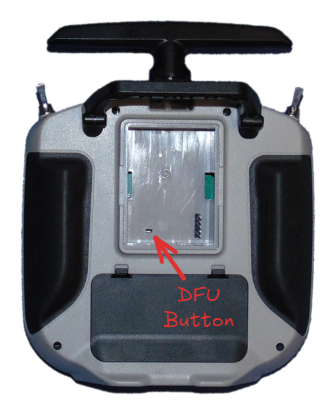
DFU: Turn off the radio transmitter. Press and hold the DFU button and plug in the USB cable, release the DFU button.
Jumper T14/T15
Bootloader: Turn off the radio transmitter. Pull both horizontal trim switches together and press the power button.
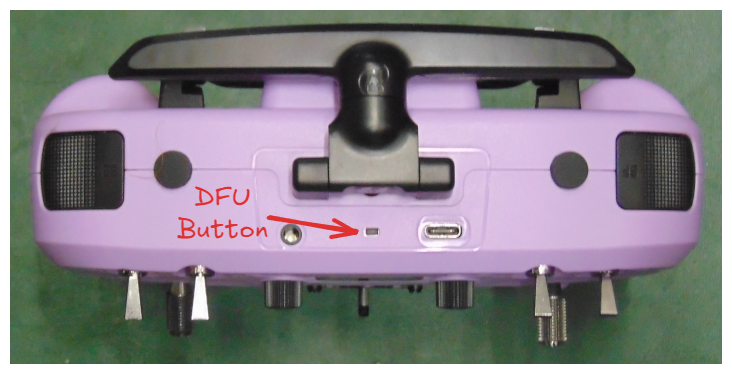
DFU: Turn off the radio transmitter. Press and hold the DFU button and plug in the USB cable, release the DFU button.
Jumper T-20/T-20S
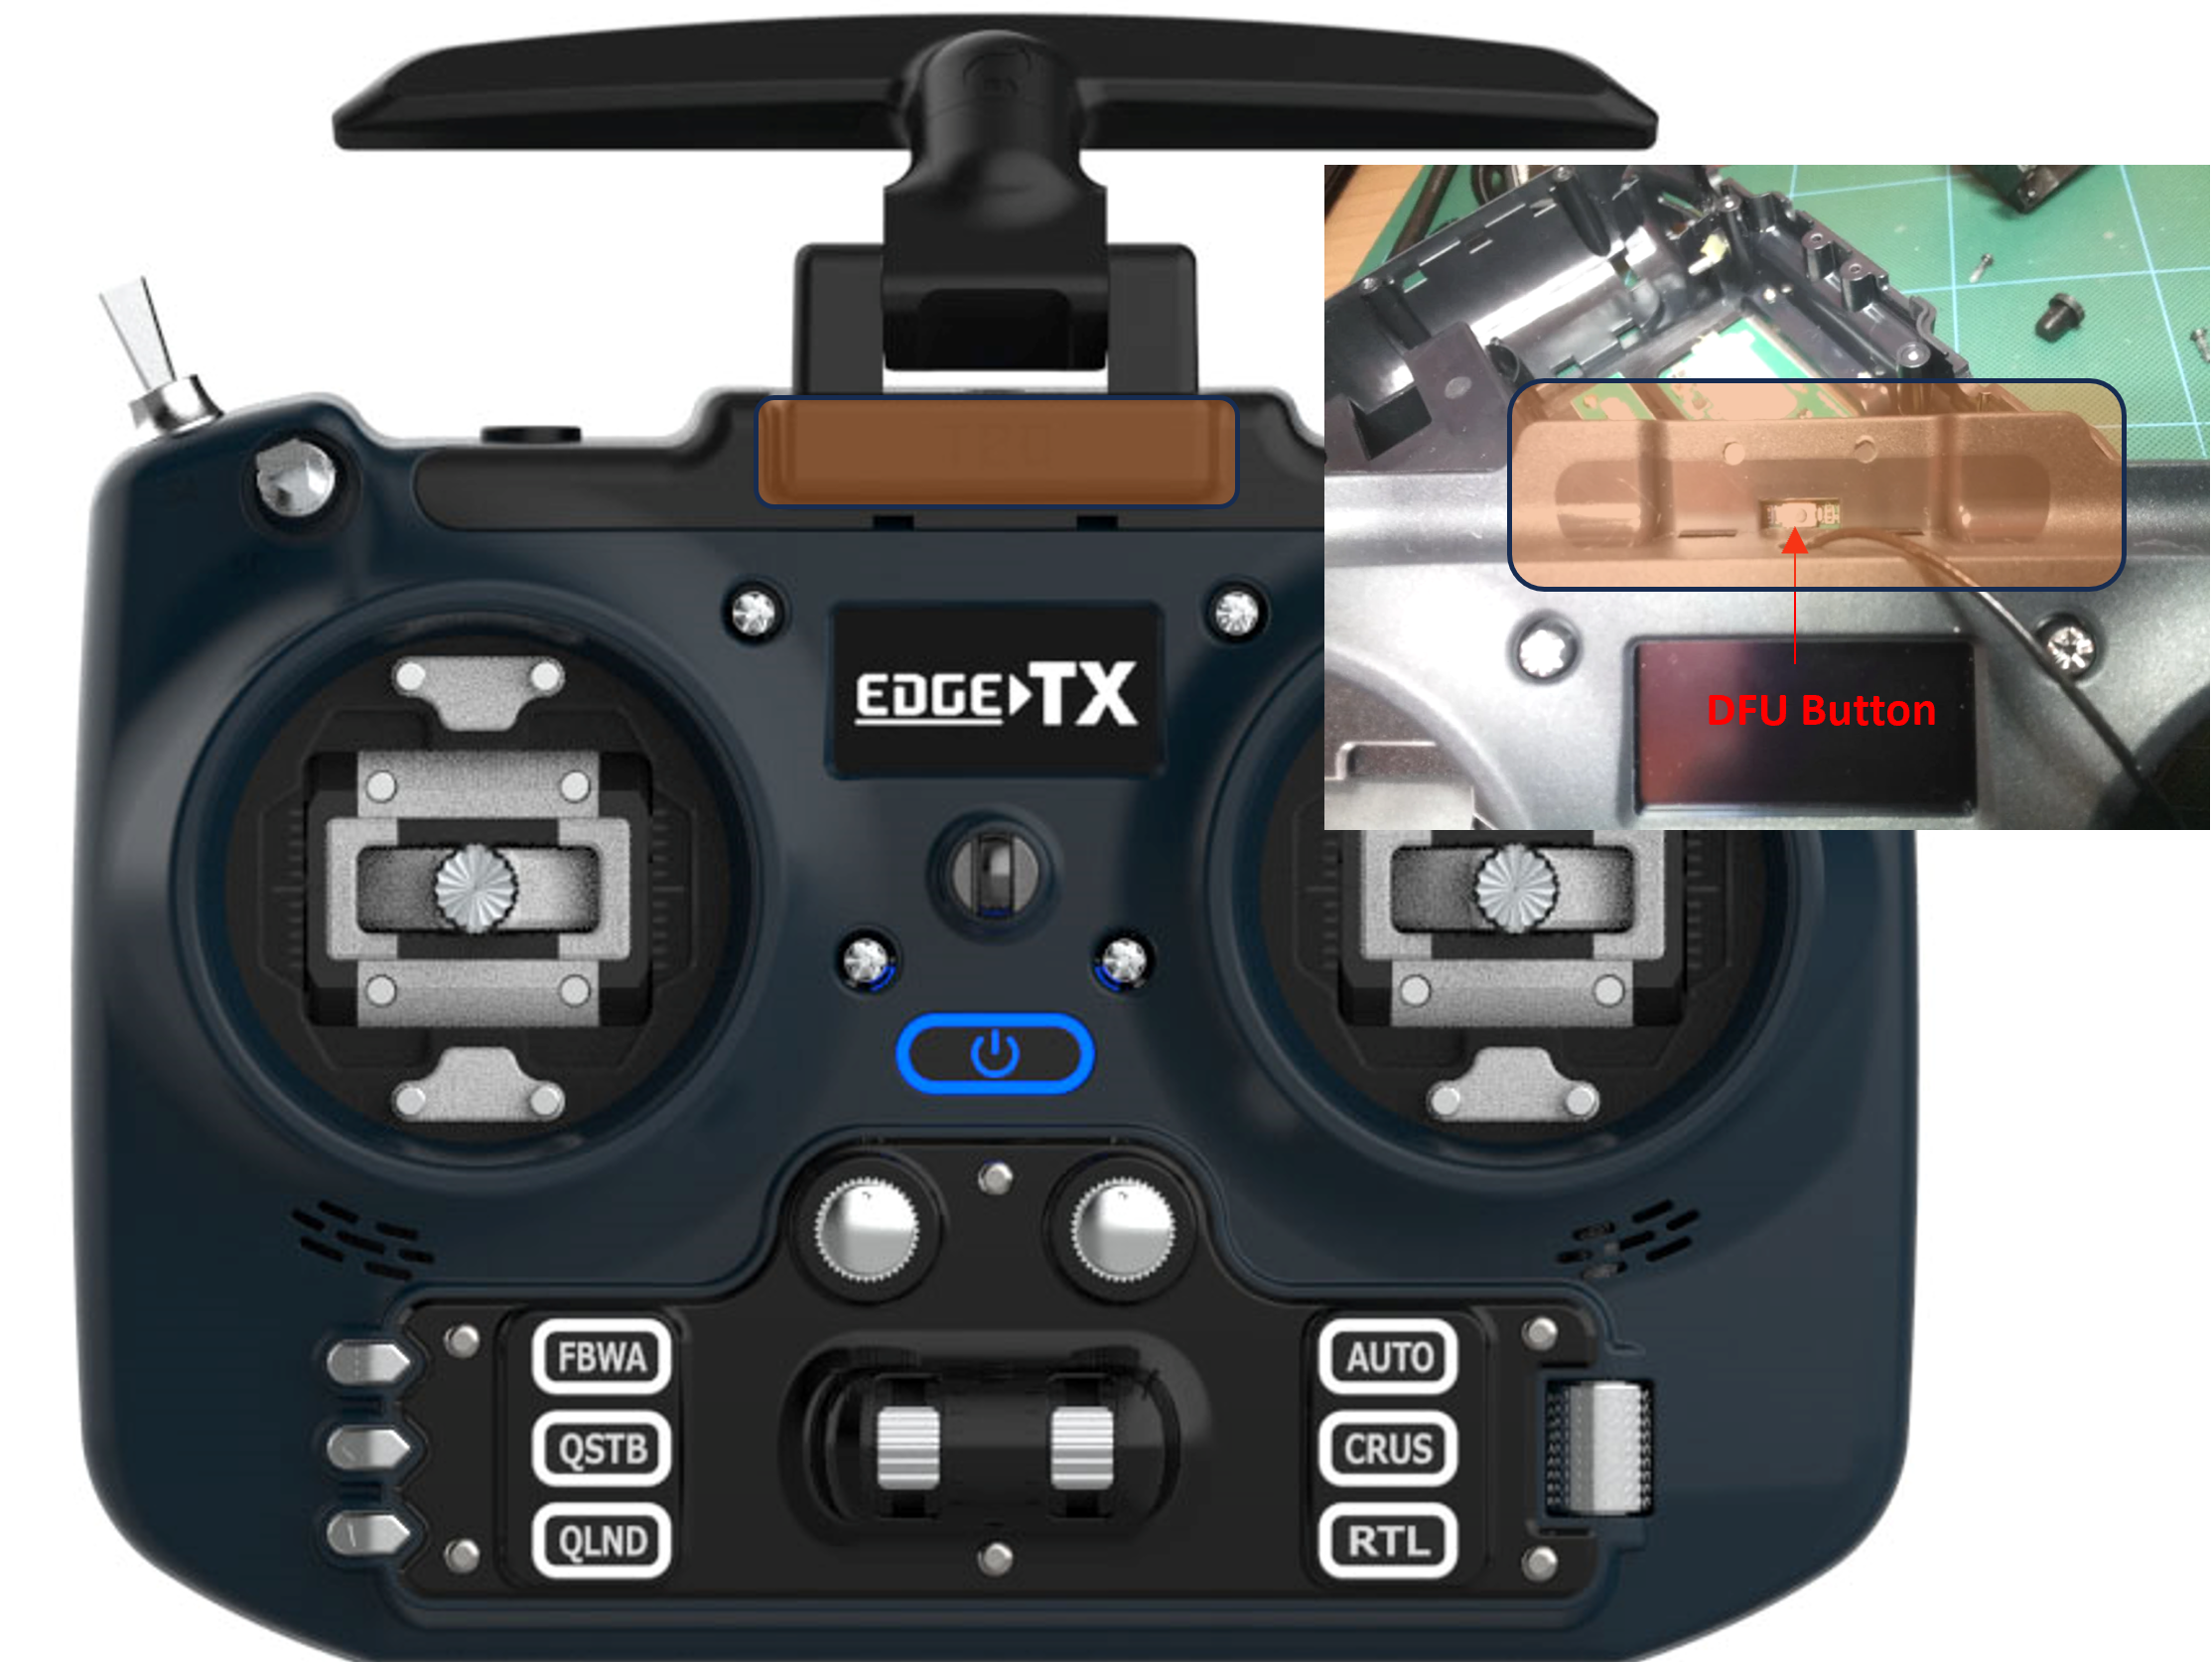
Note: To access the DFU button on v1, remove the antenna. For v2, use a toothpick to gently push the button to avoid damage.
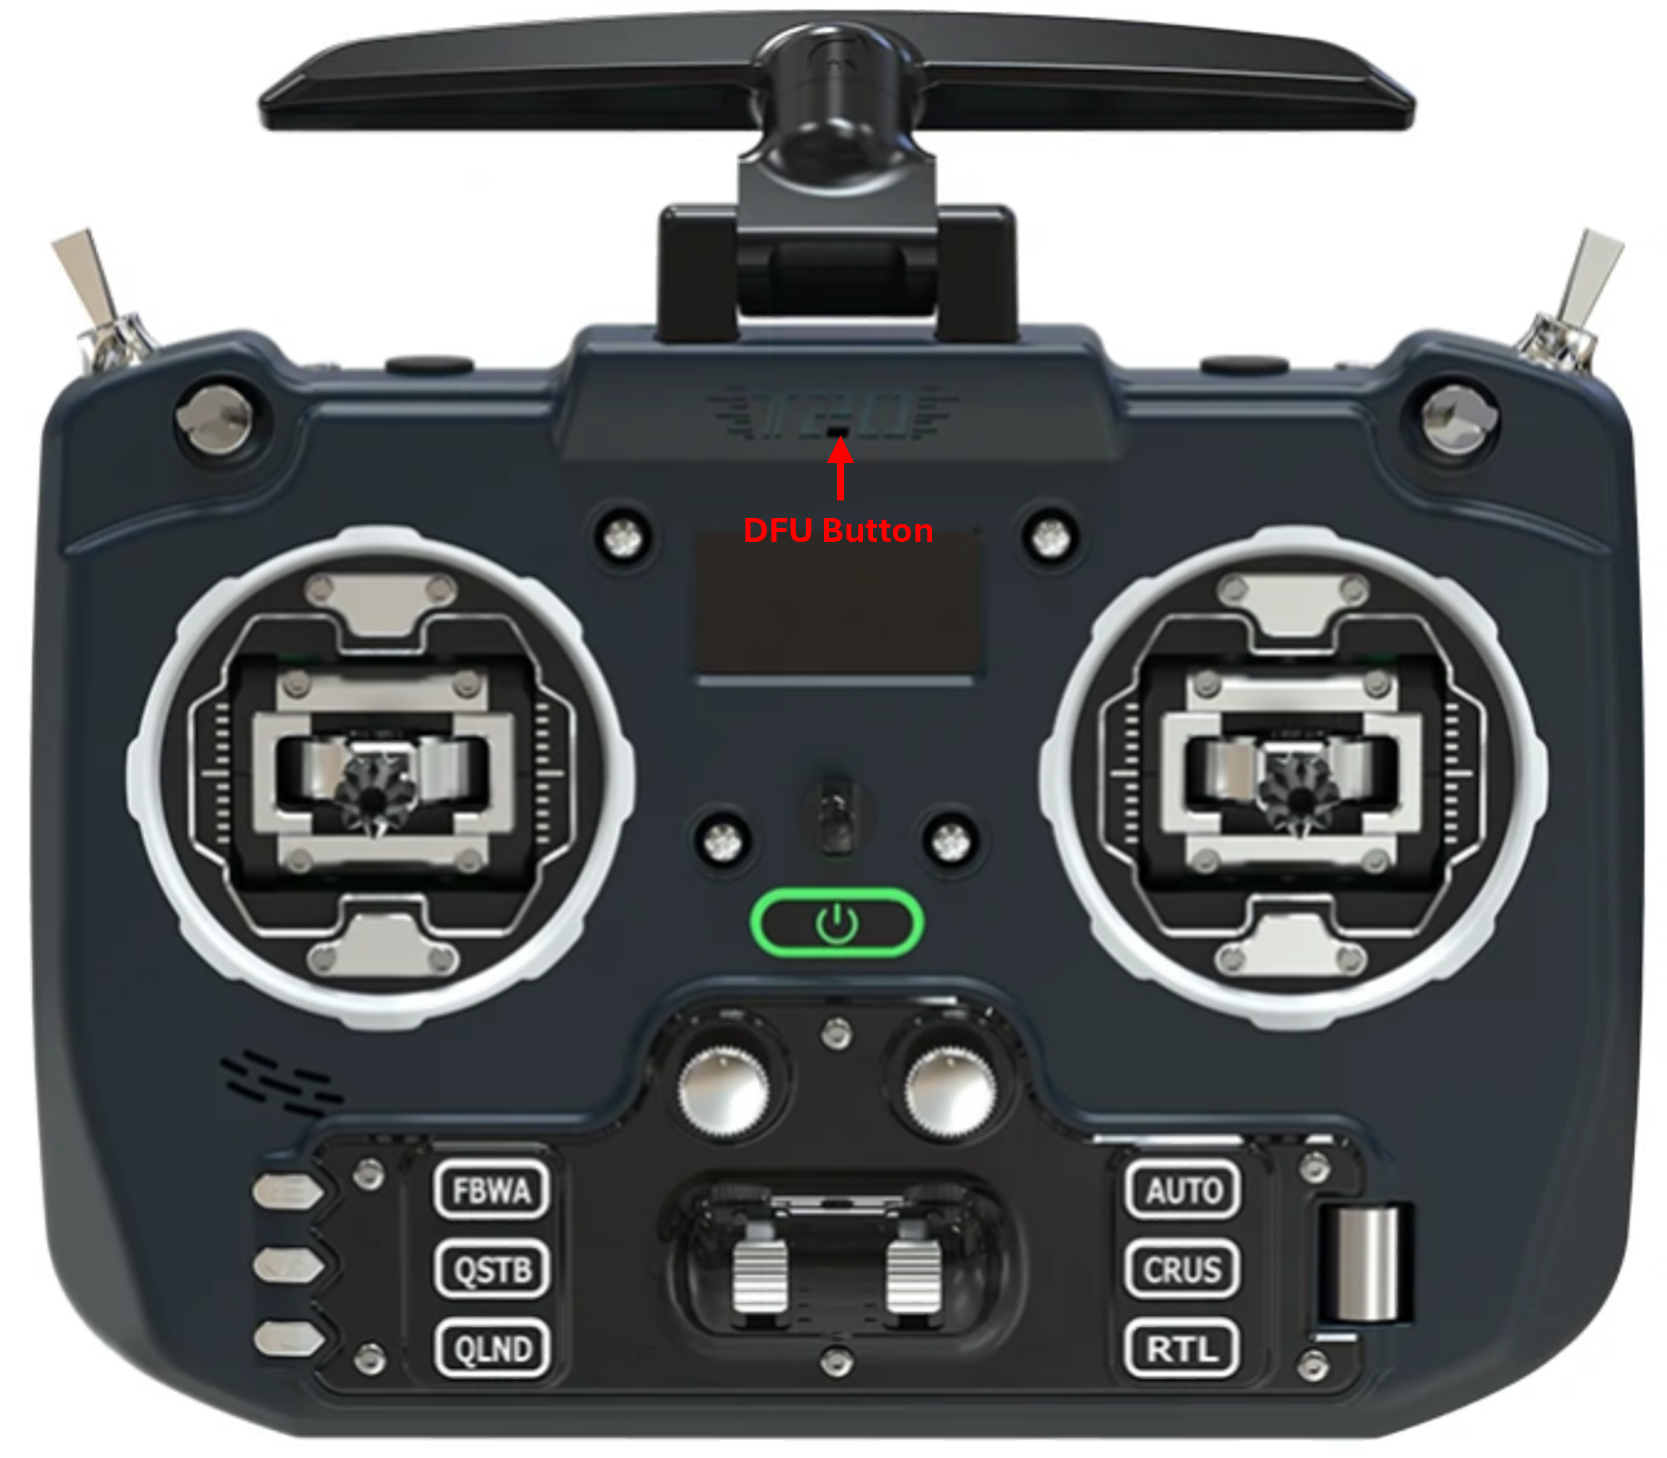
Bootloader: Turn off the radio transmitter. Push both trim hat switches inward together and press the power button.
DFU: Turn off the radio transmitter. Press and hold the DFU button and plug in the USB cable, release the DFU button.
Jumper T-Lite
Bootloader: Turn off the radio transmitter. Push both the two inner horizontal trim buttons together and press the power button.
DFU: Turn off the radio transmitter. Plug in the USB cable.
Jumper T-Pro / T-Pro V2
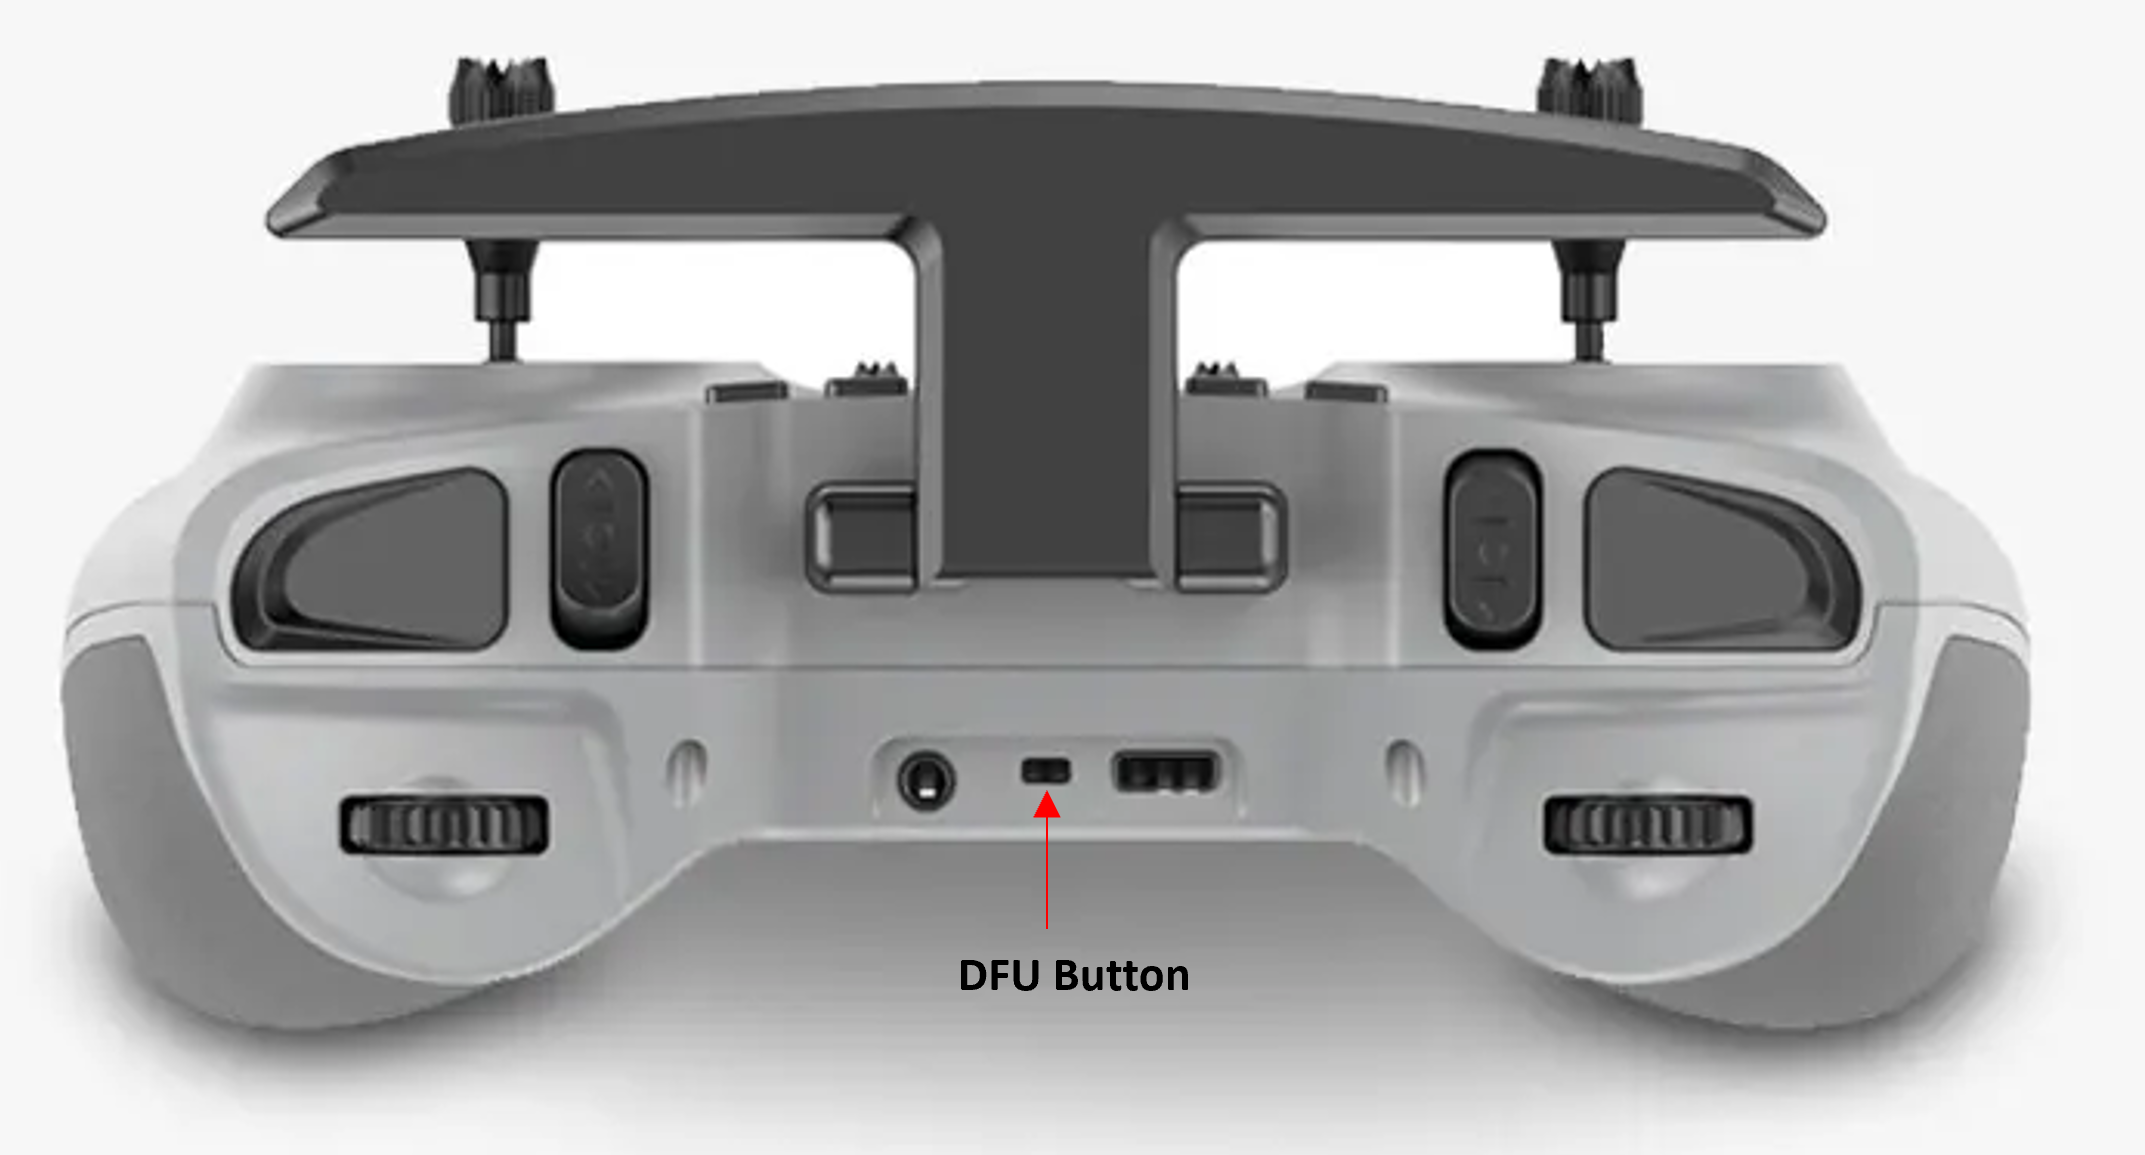
Bootloader: Turn off the radio transmitter. Push both trim hat switches inward together and press the power button.
DFU: Turn off the radio transmitter. Press and hold the DFU button and plug in the USB cable, release the DFU button.
RadioMaster GX12
Bootloader: Turn off the radio transmitter. Pull both horizontal trim switches together and press the power button.
DFU: Turn off the radio transmitter. Plug in the USB cable to the USB port on the top of the radio (power button LED should light up). Press and hold SG (top left shoulder switch) and then press and release the power button (only needs a momentary press). You can now release SG.
RadioMaster MT12
Bootloader: Turn off the radio transmitter. Pull both trims T1 and T2 together and press the power button.
DFU: Turn off the radio transmitter. Plug in the USB cable to the side USB port (under the rubber cover).
RadioMaster Pocket
Bootloader: Turn off the radio transmitter. Push both trim hat switches inward together and press the power button.
DFU: Turn off the radio transmitter. Plug in the USB cable to the USB port on the top of the radio.
RadioMaster TX15 / TX16S MK3
Bootloader: Turn off the radio transmitter. Pull both horizontal trim switches together and press the power button.
DFU: Turn off the radio transmitter. Plug in the USB cable to the USB port on the top of the radio (power button LED should light up). Momentarily press the SYSTEM (SYS) button for the radio to enter the DFU mode.
RadioMaster (All others - Boxer, TX12, Zorro, TX16S MK1/MK2)
Bootloader: Turn off the radio transmitter. Pull both horizontal trim switches together and press the power button.
DFU: Turn off the radio transmitter. Plug in the USB cable to the USB port on the top of the radio.
Eachine TX16s
Bootloader: Turn off the radio transmitter. Pull both horizontal trim switches together and press the power button.
DFU: Turn off the radio transmitter. Plug in the USB cable to the USB port on the top of the radio.
Last updated